Coverage you can act on: the gap is the button
OpenTestX rebuilt its Coverage tab around an authoritative requirement catalog. A requirement with zero tests now shows as a gap card you generate tests from in one click — the gap is the button.
Most coverage reports are read-only. They tell you a number, you nod, and nothing changes. Our own Coverage tab was worse than read-only for a while — it was correct but not valuable. It opened empty, it could only show you the tests you happened to have already imported, and it manufactured orphan noise instead of measuring against anything real. A QA owner using it put it plainly: it works, but it isn’t worth using.
We rebuilt it. The new Coverage Map is driven by an authoritative requirement catalog, and the headline isn’t “we added traceability” — every serious test tool has had that since 2014. The headline is this: the gap is the button.
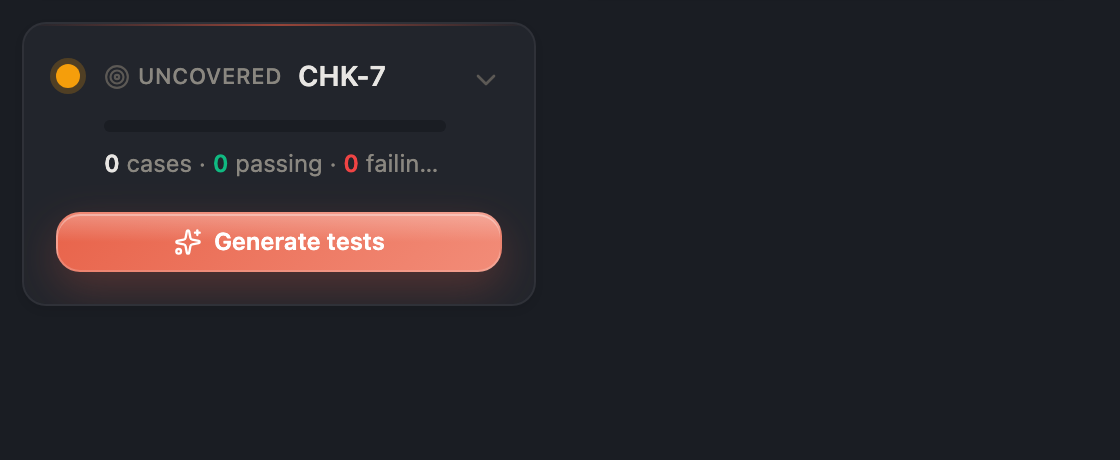
A requirement with zero tests, shown as an Uncovered card with a one-click Generate tests button.
The gap is the button
The single most useful thing a coverage tool can do is show you a requirement you haven’t tested yet. The old version structurally couldn’t: a requirement only “existed” once some test happened to carry its key. No test, no requirement, no gap — the one thing you needed to see was the one thing it couldn’t show.
The catalog fixes that by being the denominator. A requirement in the catalog with zero linked tests now appears as an Uncovered card — and that card carries a Generate tests button. Click it, and you land in chat with the requirement key already pinned. The tests you generate are born linked to that requirement, not guessed at after the fact.
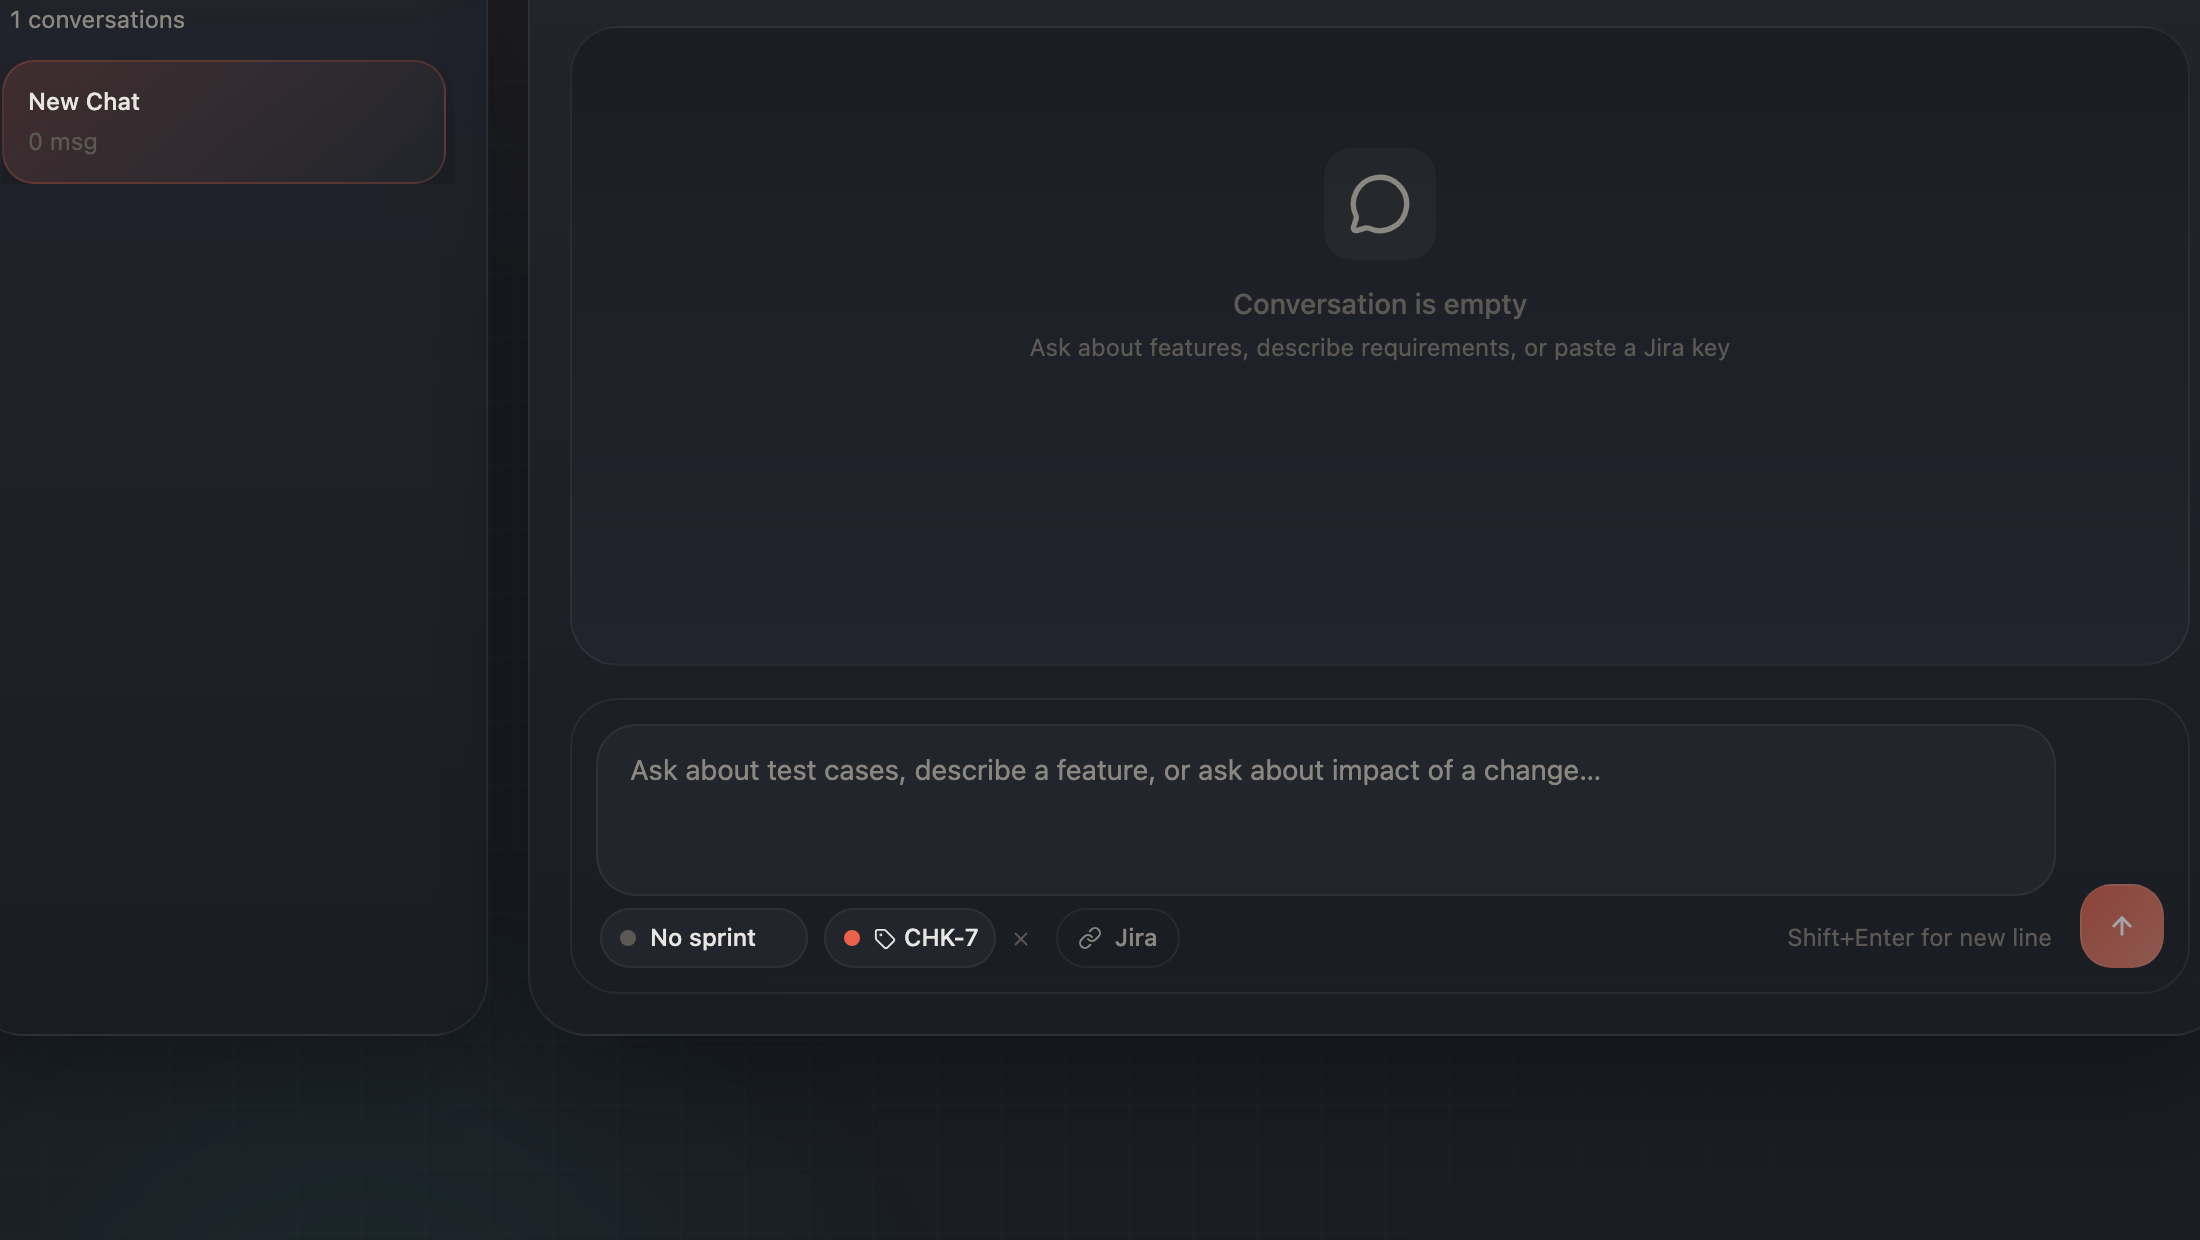
Clicking Generate tests lands in chat with the requirement key already pinned, so generated cases are born linked to it.
That’s the loop competitors structurally can’t tell. Their coverage reports show you the gap; ours hands you the button to close it, and the AI works against a closed, authoritative set of requirements instead of free-guessing a key out of arbitrary text. Coverage you act on in one click, not coverage you read and sigh at.
Coverage you can read at a glance
Expand any requirement and you get its provenance graph: requirement → tests → run status. It’s visual and on-brand, and — the part we’re quietly proud of — the connector lines carry the data themselves.
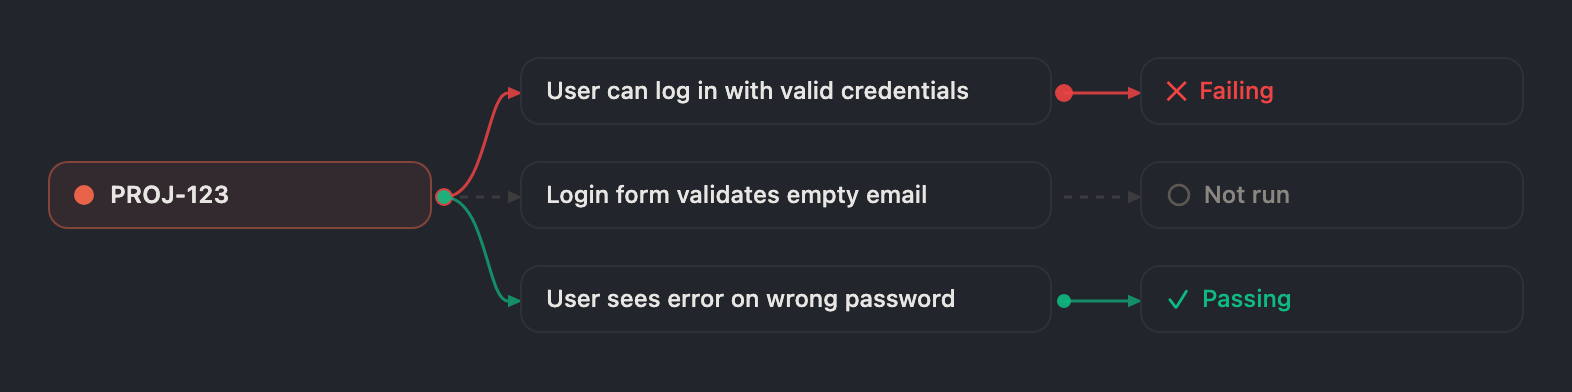
Expand a requirement to see its provenance graph: requirement → tests → run status.
A solid green line with a flowing dot is a passing test. A solid red line is a failing one. A dashed gray line with no dot is a test that hasn’t run. You read the health of a requirement before you read a single word of it. The motion is the data.
The connector lines carry the status: solid green = passing, solid red = failing, dashed gray = not run. The motion is the data.
Caught at import, not patched later
The reason the old view opened empty was that three of the four import paths silently dropped the requirement key — the one moment it was cheapest to capture. CSV used the filename, Notion used the page id, free-text used a label only if you happened to type a key. So coverage was wrong the instant you imported, and the only fix was tedious after-the-fact manual linking.
Now every import path — CSV, free-text, Jira, Notion — has a Requirement key field. Fill it and every case in that import is linked to that requirement. Leave it blank and we try to detect a single unambiguous key from the content (and if there’s more than one candidate, we don’t guess — we surface them). Type something that isn’t a valid key and we reject it inline, before the import job even starts.
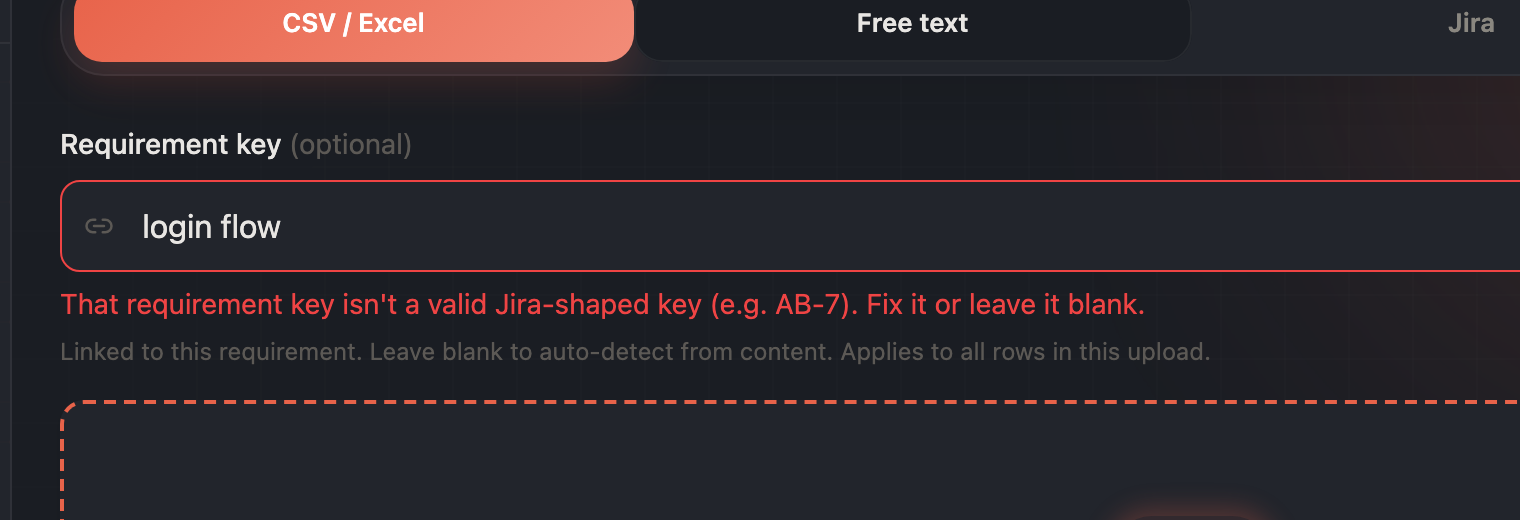
The Requirement key field at import time, rejecting a non-Jira-shaped value before the job starts.
Manage the catalog where you read it
The catalog lives on the same view you read coverage from — no separate screen. Search narrows the map to the requirements you care about, gaps included. You can archive a requirement or delete it straight from its card, and deleting is safe by construction: it unlinks the tests by default, and permanently deleting the linked tests is a deliberate, separate opt-in.
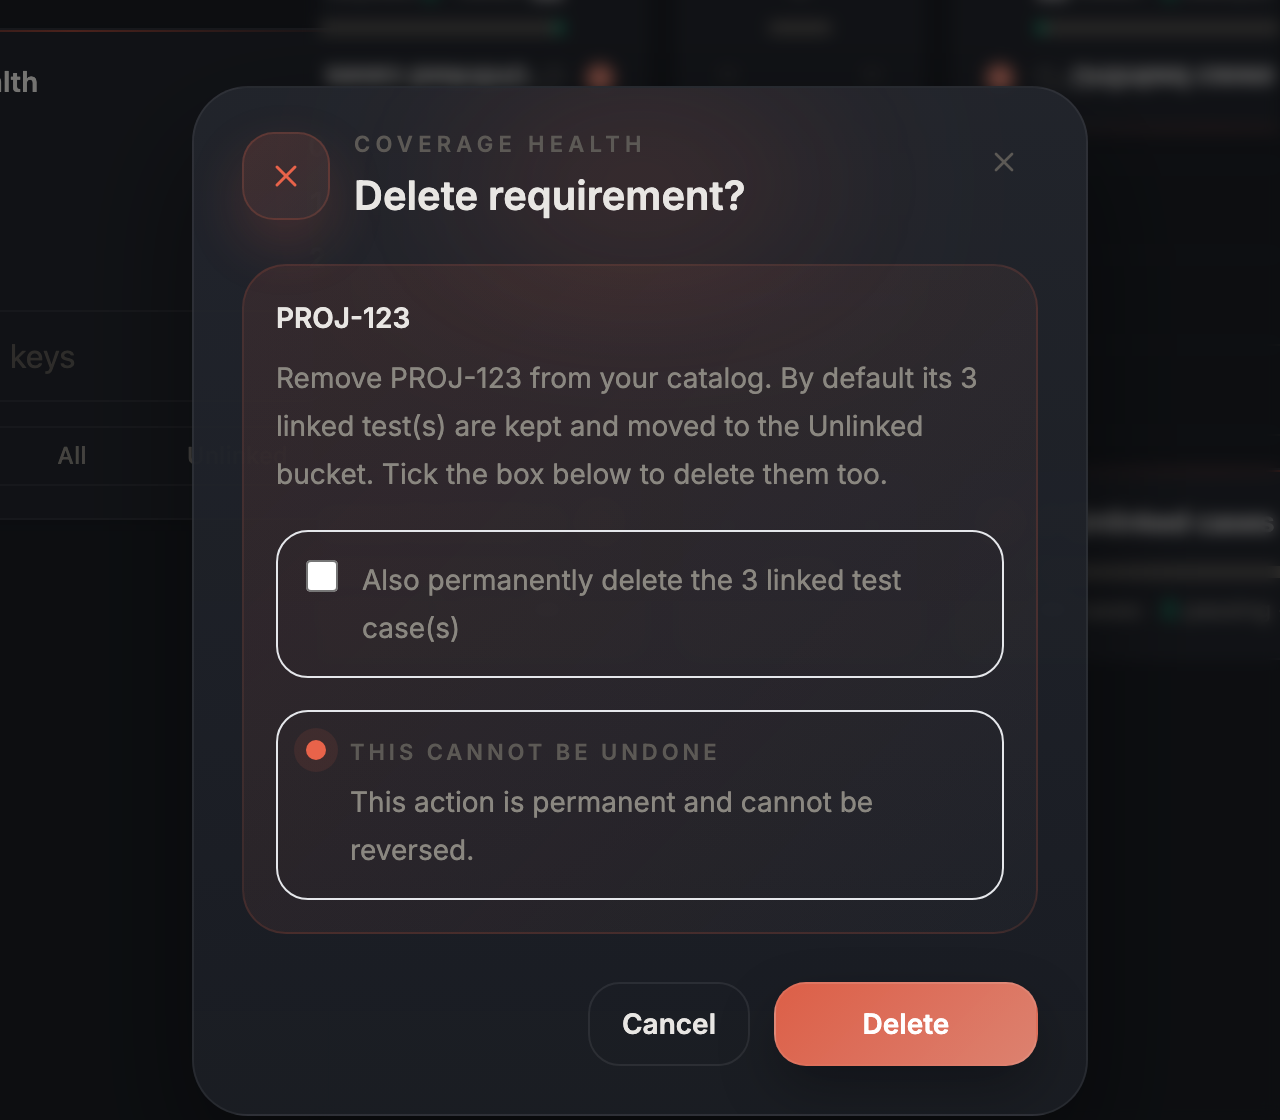
Deleting a requirement unlinks its tests by default; permanently deleting the linked tests is a deliberate opt-in.
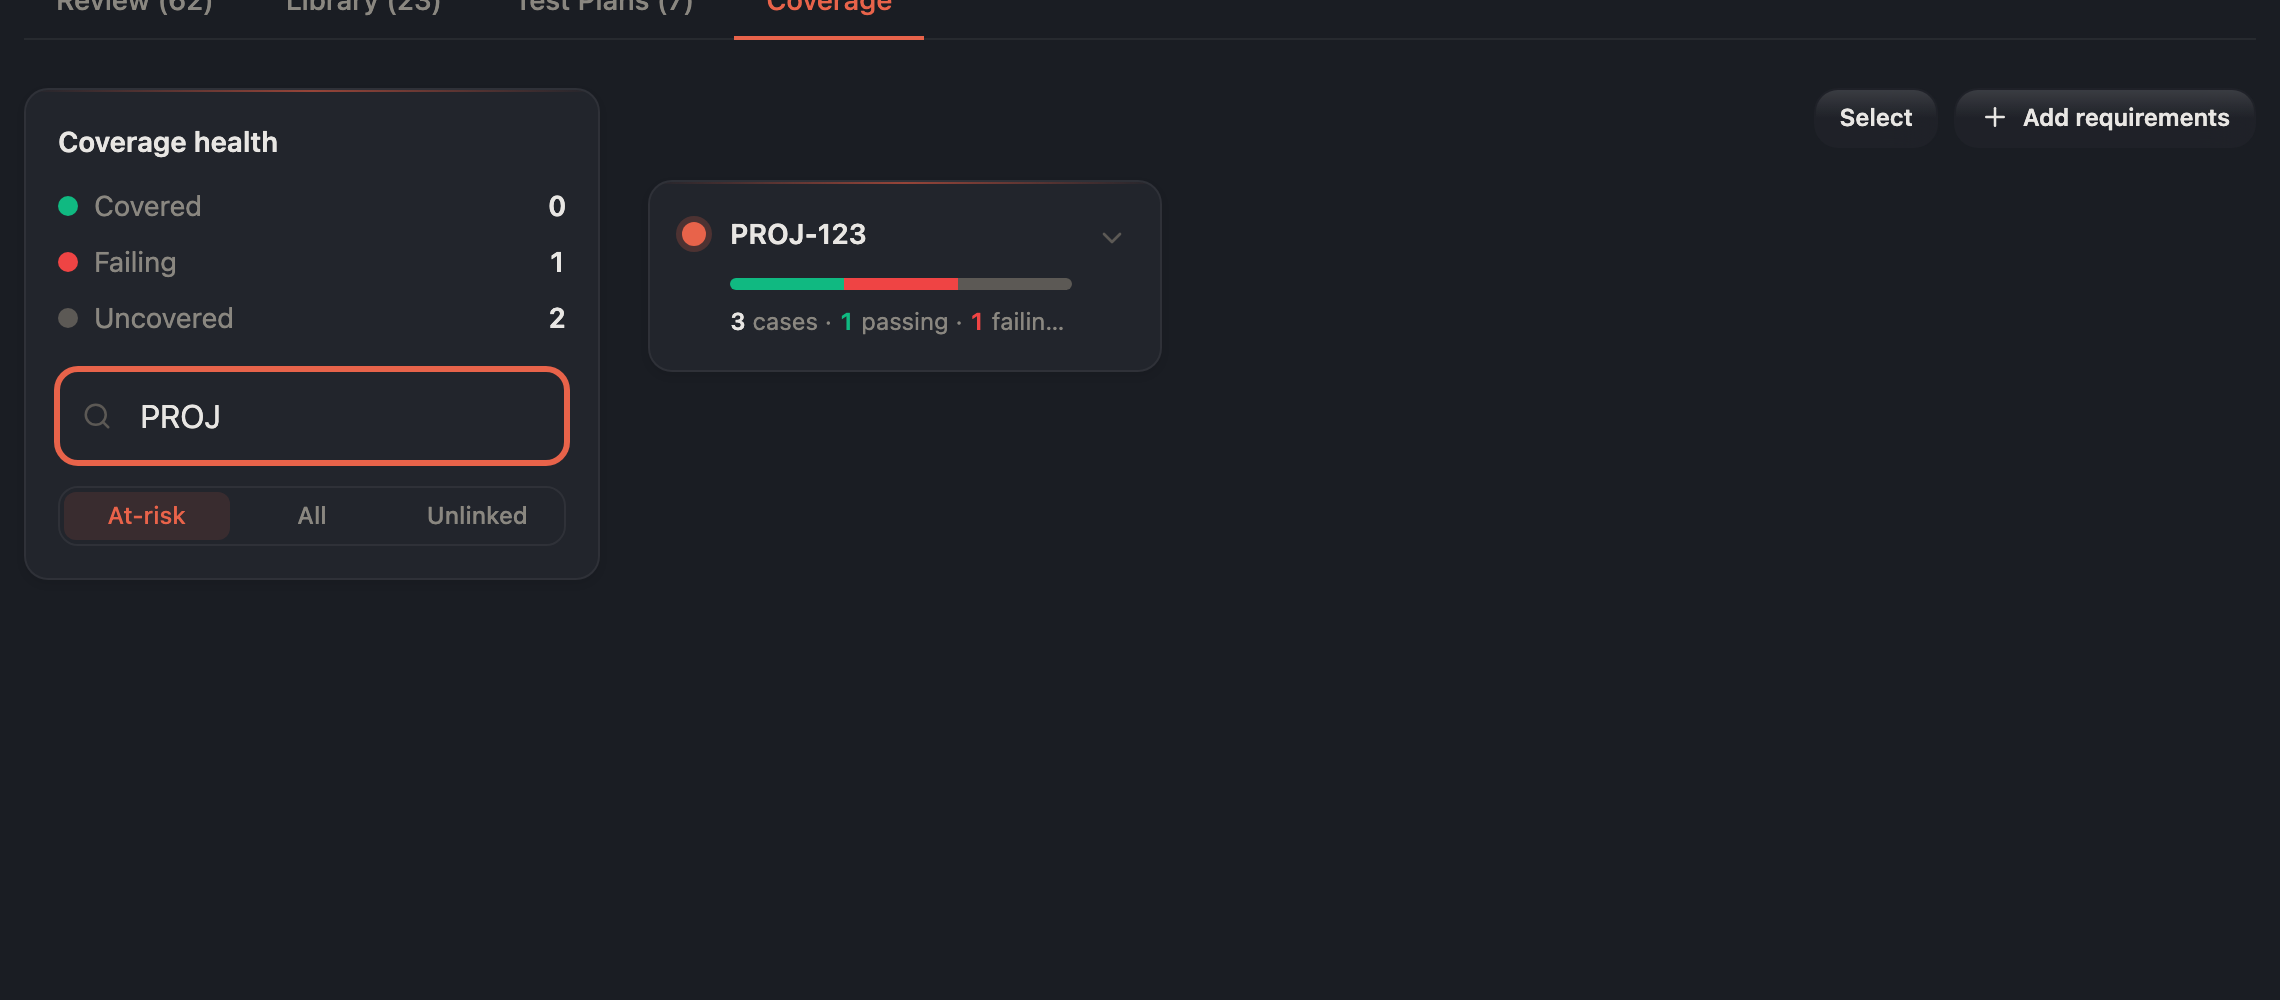
Search narrows the map to the requirements you care about, gaps included.
Honest scope
A couple of things this release is not, so you can plan around it: requirement keys are Jira-shaped (e.g. AB-7), and you seed the catalog by pasting keys or by importing — we don’t yet pull a Jira project’s issue list automatically. And the AI suggest-link — proposing which catalog requirement an orphan test belongs to — is the next step, not this one. What ships today is the catalog, capture-at-import across all four sources, and the verb that matters most: turning a red gap card into generated tests, in one click.
Curious how this looks inside your team?
Book a short consult and we will walk through how OpenTestX maps to your current QA system.
Book a consultation →Related posts
Our risk pill almost shipped a lie. Our own eval caught it.
We built a Gantt board that flags its own slipping groups and drafts a catch-up plan from your team's methodology. Then our own A/B eval told us the proof was rigged — so we fixed the product, not the test. The honest 5 → 1 → 5.
Our coral sat 9° from our error red. We fixed color by measuring, not feeling.
A user told us twice the colors were too similar. The first fix over-corrected — every category chip went gray, and uniform is not the same as clear. The second fix put a number on it: our brand coral lives at hue 9°, our error red at 0°. Nine degrees apart, same lightness. You don't argue with 9°. You move.
The governance flywheel: when recurring review findings write their own methodology rule
Every AI review finding already lands in a per-case worklist. But the patterns across cases were going unread. The flywheel reads them — and when a weakness has truly recurred, it proposes one grounded SKILL.md rule into the queue you already approve from. The SQL decides. The model only phrases. A human still signs.